Table des matières
Group mailings
 A1 proofreading not yet effective for this page. In the meantime, you can ask any questions on the forum.
The principle is as follows:
- you create a routing group made up of a subset of your contacts;
- for the group, you trigger the mailing, evening for an e-mailing, or for a paper mailing.
Using the screen
Managing routing groups
Access: Contacts ? Commercial Action ? Manage routing groups.

This screen allows you to assign contacts to a routing group. The 1 and 2 buttons allow you to add or remove the selected contacts from the selected group via the Group combo.
The 3 selector controls the action of double-clicking on the line: either modify the contact, or move it in the group. The display combo allows you to display additional areas of contact data, in order to facilitate their selection. For example, if you want all the contacts in a department, display the professional postal code, sort the results by this column, and select all the contacts in the department.
 It is possible to assign a contact to a routing group via the Other info tab of the contact card.
The Ship button opens the mail merge screen.
Group mailing
Access: Contacts ? Commercial Action ? E-mailing and direct mailing.

You can add recipients to the sending, either already existing routing groups or contacts individually. You can delete a recipient from the sending (Delete button), or delete them from the group and from the sending at the same time (Delete button).
The context menu of the table allows you to geolocate the selected elements.
The lower part of the screen allows you to select the campaign method, either an email or a letter.
Sending by email
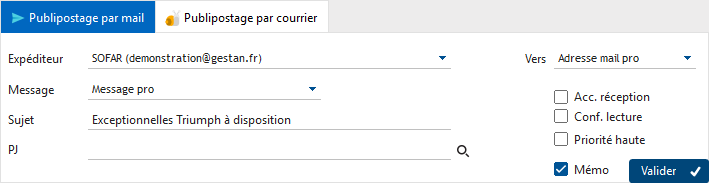
The tab allows you to define the characteristics of the e-mailing:
- The sender
- The standard message, whether it is previously recorded in the standard messages, or whether it is a one-off message written for the occasion (“Special one-shot” option)
- the subject of the message
- any attachments
- the target email to take into account for the group (combo To)
If the Memo box is checked, the sent email will be stored in the contact's Actions folder.
The Validate button triggers the e-mailing. A sending tracking screen is displayed: you can continue working while the mailing is carried out in parallel.
Sending by mail

The tab allows you to define the characteristics of the mailing:
- the standard letter to send, what must be recorded in the standard letters
- the type of printing requested: standard (i.e. the complete standard mail), pre-printed (the direct mail will be printed on pre-printed paper), or addresses only.
The Validate button triggers the generation of the mailing file.
 Other Contacts articles